The Backend-for-Frontend pattern using NextJS A Step-by-Step Guide
Prithwish Nath
Archive Notice
This article is archived and no longer maintained. It describes an earlier version of WunderGraph used as a Backend-for-Frontend framework, which is no longer part of the current product architecture. The setup, APIs, and implementation details may not work as described. For current documentation and guidance, see WunderGraph Cosmo
The BFF (Backend for Frontend) pattern, originally pioneered by SoundCloud , has had its era, much like SoundCloud’s own evolution. Today, SoundCloud stands as a proud customer and power user of WunderGraph Cosmo. If you're interested in learning how they transitioned from the BFF pattern to a federated GraphQL approach, we’d be happy to chat—book a time with us!
State of GraphQL Federation 2026
How are teams governing schema changes, handling production traffic, and measuring Federation success? Share your experience and get early access to the full report. For every valid survey completed, we'll donate $30 to UNICEF .
The Backends-for-Frontends pattern might be exactly what you need to avoid monolithic Backend APIs and Frontends bloated with business logic. Let’s implement one in Next.js, using WunderGraph as a BFF framework.
Picture this: you’ve just developed and deployed your dream app. (Congratulations!) To serve your desktop/web browser UI, you’ve probably built some sort of backend…but what happens when you grow, and perhaps start offering a mobile app to serve your growing userbase? That backend now has to be jury-rigged to become more of a general-purpose solution, serving more than one platform (or more accurately, user experience).
Now, things get a little less fun, for both devex and developer velocity in your org:
- Your mobile app has needs and requirements that are significantly different from your desktop app, to the point where your backend is now flooded with competing requirements.
- To ease some of the pressure on the backend team, you end up writing complex business logic in the frontend, tightly coupling your UI layer to it. The result? Messy codebases that are difficult to read and to maintain.
- Sure, separate UI/UX teams working on each frontend will speed up development…until both find that the backend team is the bottleneck, not being able to come up with feature adds/refactors/bugfixes that balance requirements of both platforms without breaking functionality for both user bases.
- You also end up with overfetching/underfetching issues on at least some of your supported platforms. The mobile UI/UX doesn’t need the data that your desktop app does, but processing and sending out bespoke data for each client on the backend layer isn’t an option — that’s going to slow things down further.
At this point, you’re probably thinking something along these lines:
Ugh, this wouldn’t be a problem if I could just have a separate ‘backend’ for each of my frontends! Perhaps one such API per frontend, tailor made for it, and maintained by the team working on that frontend so they have full control over how they consume data internally.
Congratulations, you’ve just described the Backends-for-Frontends (BFF) pattern!
Pioneered by SoundCloud , it makes developing for varied user experiences (a desktop/web browser, a mobile app, a voice-based assistant, a smartwatch, and so on.) much more manageable in terms of orchestrating and normalizing data flows, without your backend services becoming inundated with requests or your frontend code having to include complex business logic and in-code data JOINs.
For this tutorial, let’s build a simple Dashboard for an eCommerce that we’ll implement using the BFF pattern. We’ll use Next.js as our frontend, two simple microservices for our data, and WunderGraph as our Backend-for-Frontend.

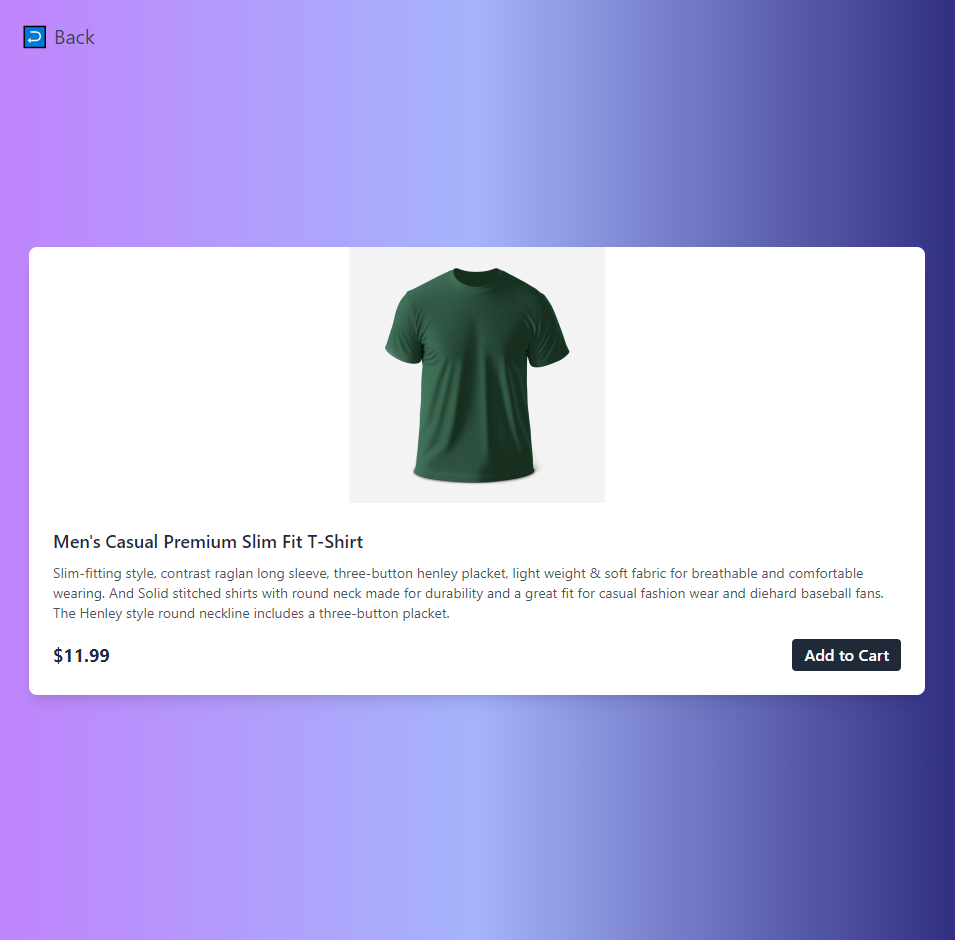
The Products pages, using the Products microservice for their data.
Before we start coding, here’s a quick diagram of our architecture, so you know what you’ll be building.
And here’s what our tech stack will look like:
To build our backend as microservices, each an independent API, with its own OpenAPI V3 specification. This is NOT a tutorial about microservices, so to keep things simple for this tutorial, we’ll limit our backend to 2 microservices — Products, and Orders — and mock the downstream data calls they make, rather than interfacing with an actual database.
For our frontend.
You can think of this as an API gateway that serves as the only ‘backend’ that your frontend can see, coordinating all calls between the two on a request, transforming data according to unique requirements, and optionally even incorporating auth and middleware, instead of having your frontend be concerned with any of that, or interacting directly with your backend APIs.
WunderGraph works by consolidating data from the datasources that you name in its config file (Databases or API integrations. For this tutorial, it’s microservices as OpenAPI REST) into a unified API layer that you can then use GraphQL queries or TypeScript Operations to get data out of, massage that data as needed for each separate user experience that you want to provide, and deliver it to the Next.js frontend via auto-generated, type-safe data fetching hooks.
Here are the instructions for setting it up for Next.js . I’m using it because I love utility-first CSS; but you could use literally any styling solution you prefer. Tailwind classes translate quite well because it’s literally just a different way to write vanilla CSS.
Let’s dive right in!
First of all, don’t let “microservices” scare you. This is just an architectural style where a large application (our Express.js backend) is divided into small, independent, and loosely-coupled services (here, one Express.js app for the Product Catalog, and another for Orders). In real world projects, each microservice would be managed by a separate team, often with their own database.
Each microservice is just an Express app with its own endpoints, each focusing on performing a single specific task — sending the product catalog, and the list of orders, respectively.
The next step would be to include these APIs as data dependencies for WunderGraph. The latter works by introspecting your data sources and consolidating them all into a single, unified virtual graph, that you can then define operations on, and serve the results via JSON-over-RPC. For this introspection to work on a REST API, you’ll need an OpenAPI (you might also know this as Swagger) specification for it.
💡 An OpenAPI/Swagger specification is a human-readable description of your RESTful API. This is just a JSON or YAML file describing the servers an API uses, its authentication methods, what each endpoint does, the format for the params/request body each needs, and the schema for the response each returns.
Fortunately, writing this isn’t too difficult once you know what to do, and there are several libraries that can automate it . If you’d rather not generate your own, you can grab my OpenAPI V3 spec for our two microservices, in JSON here , and here . They’re far too verbose to be included within the article itself.
Finally, to keep things simple for this tutorial, we’re using mock eCommerce data from the Fake Store API for them rather than making database connections ourselves. If you need the same data I’m using, here you go .
WunderGraph’s create-wundergraph-app CLI is the best way to set up both our BFF server and the Next.js app in one go, so let’s do just that. Just make sure you have the latest Node.js LTS installed, first.
npx create-wundergraph-app my-project -E nextjsThen, cd into the project directory, and
npm install && npm startIf you see a WunderGraph splash page pop up in your browser (at localhost:3000) with data from an example query, you’re good to go!
In your terminal, you’ll see the WunderGraph server (WunderNode) running in the background, watching for any new data sources added, or changes made, ready to introspect and consolidate them into a namespaced virtual graph layer that you can define data operations on. Let’s not keep it waiting.
Our data dependencies are the two microservices we just built, as Express.js REST APIs. For this. So add them to wundergraph.config.ts , pointing them at the OpenAPI spec JSONs, and including them in the configureWunderGraphApplication dependency array.
Once you hit save, the WunderNode will introspect the Products and Orders microservices via their OpenAPI spec, and generate their models. If you want, check these generated types/interfaces at ./components/generated/models.ts. You’ll be able to see the exact shapes of all your data.
Now, you have all the data your services provide at your disposal within the WunderGraph BFF layer, and can write either…
- GraphQL queries/mutations, or
- Async resolvers in TypeScript (WunderGraph calls these TypeScript Operations)
… to interact with that data.
Choose whichever one you’re familiar with, as ultimately, accessing that data from the frontend is going to be identical. This tutorial is simple enough that we can cover both!
WunderGraph’s GraphQL Operations are just .graphql files within ./.wundergraph/operations.
TypeScript Operations are just .ts files within ./.wundergraph/operations, use file-based routing similar to NextJS, and are namespaced. So here’s what our operations will look like :
These TypeScript Operations have one advantage over GraphQL — they are entirely in server-land — meaning you can natively async/await any Promise within them to fetch, modify, expand, and otherwise return completely custom data, from any data source you want.
Let’s go ahead and write operations to get Products and Orders by their respective IDs, too.
Note how we’re using Zod as a built-in JSON schema validation tool.
Which one should you use? Well, that depends on your requirements. If your BFF needs to process and massage the data returned by your microservices/other datasources, TypeScript operations will be the way to go, being much more flexible in how you can join cross-API data, process error messages from your backend into something consistent and uniform for your frontend, and use Zod to validate inputs/API responses.
Once you have your data, it’s on to the frontend! When you hit save in your IDE after writing these operations (whichever method you’ve chosen), the WunderNode will build the types required for the queries and mutations you’ve defined, and generate a custom Next.js client with type-safe hooks you can use in your frontend to call those operations and return data.
Essentially, our frontend is just two pages — one to show all the orders, and another to show the Product Catalog. You can lay this out in any way you like; I’m just using a really basic Sidebar/Active Tab pattern to switch between two display components — <ProductList> and <OrderList> — selectively rendering each.
WunderGraph generates typesafe React hooks for your frontend, every time you define an operation (whether using GraphQL or TypeScript) and hit save. Here, we’re using useQuery, specifying the name of the operation (see how our Operations being namespaced helps?). After that, it’s all home stretch. We just feed the data each hook returns into our components, to render out the data however we want.
With that out of the way, let’s look at those display components (and the basic card-style components they use for rendering individual items)
And here’s the Sidebar component.
Finally, here are the individual Product/Order pages, as Next.js dynamic routes.
That’s everything! Point your browser to http://localhost:3000 if you hadn’t already, and you should see the data from our microservices rendered out into cards, based on which tab on the Sidebar you’re on.
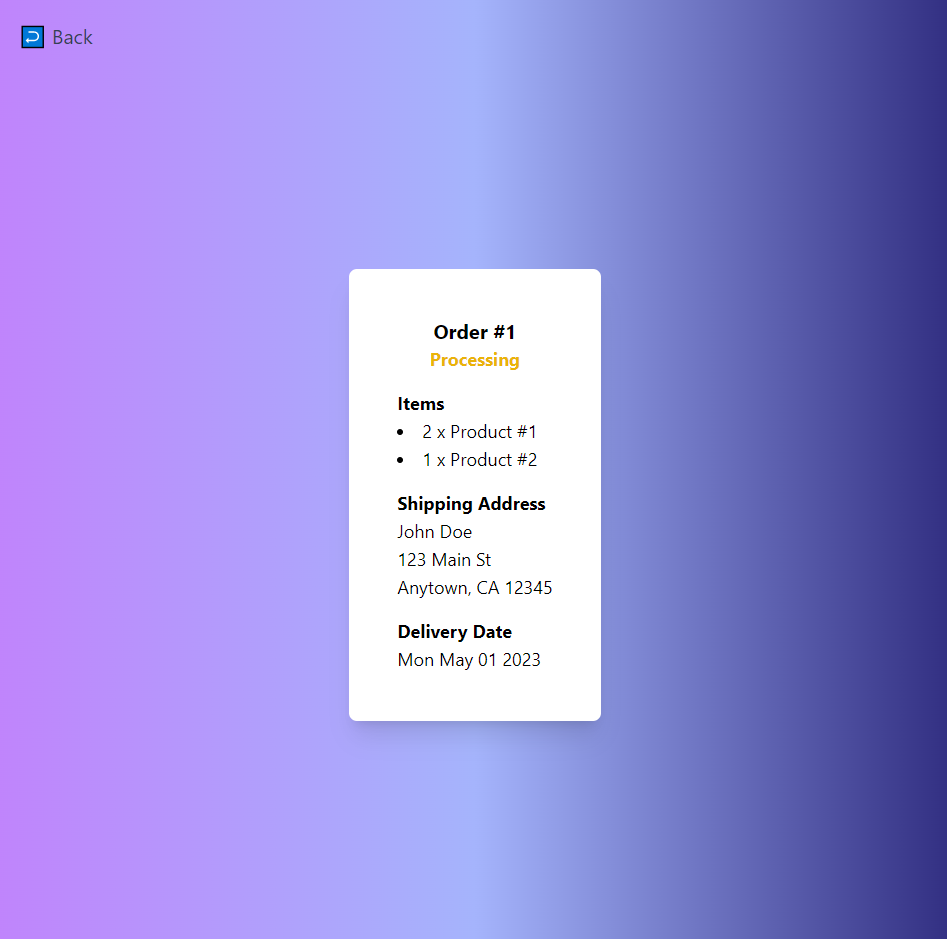
The Orders pages, using the Orders microservice for their data.
The Backend-for-Frontend (BFF) pattern can be an incredibly useful solution when your backend becomes a complex, all-for-one monolithic API, and when you start including business logic in your different frontends to compensate, it matches your backend in complexity and lack of maintainability.
But when you get down to actual development, building BFFs can be difficult. It’s possible, certainly, but there’s a massive amount of boilerplate to write every single time, and orchestrating calls between the frontend and the backend services is a pain if rolling your own solution.
As an analogy…if you want to get into React, the go-to recommendation is to just pick up Next.js as a framework. But nothing like that existed for BFFs…until now.
With WunderGraph, building typesafe BFFs with either GraphQL or TypeScript becomes a cakewalk. You cut through all the boilerplate by explicitly defining your data sources — OpenAPI REST/GraphQL APIs, databases like PostgreSQL, MySQL, MongoDB, and even gRPC — and letting WunderGraph’s powerful code generation templates generate a typesafe client for you. All with top notch developer experience from start to finish.